Five Invisalign Tips Every Patient Should Know
My patients tell me every day how much they love their clear aligners. It's true! They know they are on the journey to the smile they always wanted, and are surprised at just how discreet and comfortable their treatment can be.
But comfort doesn't just happen; as with all things in life, it requires planning, discipline, and sacrifice. And it doesn't hurt to know a few Invisalign tips and tricks to alleviate the aches and pains that occur when straightening your teeth with clear aligners.
- Protect your mouth and tongue
- Remove your trays the safe and sanitary way
- Keep your aligners clean and clear
- Do your chewing exercises!
- Prepare for the journey with essential accessories
1. Protect Your Mouth And Tongue
There's no getting around it: those cold plastic trays are going to be in your mouth 22 hours a day, and your mouth is not going to like it. During the early days of treatment, you may experience sores in your mouth and on your tongue from Invisalign sharp edges. While your mouth will naturally toughen up as you proceed, the first few weeks of treatment can be a trying time.
Dental wax for Invisalign can be a lifesaver here when applied to the rough edges of your trays. Here's a tip on how to apply the dental wax: pinch off a small chunk and roll it between your fingers to soften it up. Then apply it to the problem area of your trays! For really sharp edges, you can use a nail file to smooth them out, but be very careful not to bend or warp the aligners. Here's a video from Dr. Courtney Schiefelbein that shows you how to do it, along with some other neat tricks for sharp edges!
Tongue irritation is another unexpected nuisance for most people when they start their clear aligner treatment. Your tongue is very active during speech, causing it to rub up against those plastic edges which can lead to cuts and uncomfortable hot spots. Use a peroxide-based mouthwash like Colgate Peroxyl to clean the sores and promote healing, as well as reduce odor-causing bacteria. My patients love the effervescence of the peroxide and say it makes their mouths feel extra clean!
2. Remove Your Trays the Safe & Sanitary Way
My second Invisalign tip is more important than you might think, as improper removal can wreak havoc on your smile journey. One common mistake is pulling your trays out from only one side, which can warp the plastic and cause your trays to fit improperly. And when trays fit improperly, they can further irritate your teeth and gums while failing to move your teeth in the appropriate way.
For new patients, a common question is how to take off Invisalign easily. When removing your invisible braces, it's important to think "inside-out." While it seems simple enough to just pull them off from the outside, don't do it. The outer trays are contoured, which means they can poke right under your fingernail if you aren't careful. Or worse, your fingers will slip on the trays and you'll cut your cheek or gums. Not good!

Using your fingers is also not a best practice, especially during cold and flu season. If you want a safe, sanitary way to remove your clear aligners, we recommend Pul Tool, which has a special hook that grabs your trays and releases them from your teeth.
3. Keep Clear Aligners Clean & Clear
What's the best thing about clear aligners? Many of my patients will say its because no one can see when you wear them. This is typically true, but only if you know how to clean Invisalign. Failing to keep them clean can lead to cloudy aligners and staining, and no one wants to see that!
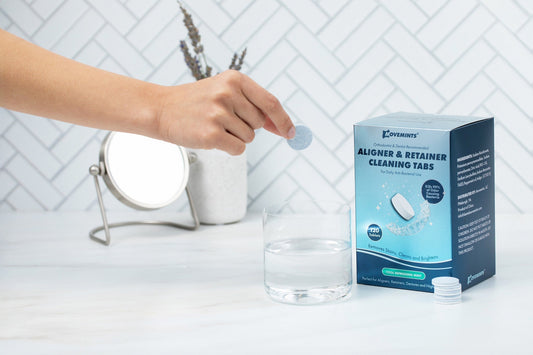
Everyone will develop their own routine when it comes to cleaning their trays. A quick soak in denture cleaner is a good one, or using a homemade concoction of hydrogen peroxide and water works too. One of my favorite patients told me about her favorite technique, which was brushing the trays with her tooth brush every time she brushed her teeth. Rather than scrubbing them with brand new tooth paste (which contains abrasives that can scratch your trays, making them less invisible), she uses the paste left over at the end of her brushing to then take a pass at the aligners.
However you choose to clean them, make it a priority. For a quick, convenient on-the-go cleaning, I recommend Smilesaver Spray. One pump works in 60 seconds to clean and freshen your trays, and the great-tasting formula doesn't require rinsing! It's a perfect product for those with active lifestyles.

4. Do Your Exercises!
Invisalign straightens your teeth by creating orthodontic tooth movement. The better your trays fit, the better your teeth will move. It's that simple.
In order to maximize orthodontic tooth movement, I tell my patients to perform chewing exercises several times a day, and especially after you reinsert your aligners. Chewing exercises help you achieve excellent results by making sure your Invisalign is tracking with your teeth. They also generate beneficial blood flow to the teeth and gums, which can really help if your Invisalign hurts.
For the longest time, the only thing we had to offer our patients to enable these exercises was a styrofoam chewie. That didn't sit well with me. Not only did the chewies taste gross and smell awful, they made me gag! I knew there had to be a better way, so after years of labor I finally came up with the perfect solution: Movemints clear aligner mints!
The patented grooves in each xylitol mint fit conveniently between your top and bottom trays. Plus, they freshen breath and treat Invisalign dry mouth, so you never have to feel insecure about your clear aligners.
5. Prepare for the journey with essential accessories
Your treatment journey can last anywhere from 6 months to two years, and your aligners will be with you every where you go. From brushing teeth in public restrooms to discretely flossing in odd locations, clear aligner patients are always on the lookout for the best accessories.
There are so many great products available to help you enjoy Delicious Progress™ during your aligner journey. It can get a little overwhelming, so we compiled our "must have" Invisalign accessories into one convenient blog post.


